Thursday, April 30, 2015

How To Convert Wordpress Blog To Blogger

Blogger is a very powerful and widely used publishing platform on the internet because it is very easy to use for beginner blogger who are ... thumbnail 1 summary
Blogger is a very powerful and widely used publishing platform on the internet because it is very easy to use for beginner blogger who are looking for learns blogging quick and easy way to create their blog online. Most of bloggers used wordpress platform for publishing their content but some of them faced few issues in wordpress platform, so they want to move their wordpress blog to blogger platform. In this article we provide you step by step guide of How to Convert Wordpress Blog to Blogger.


It’s not easy to transfer wordpress blog to blogger platform so we provide you step by step guide to migrate your wordpress blog to blogger. Its need to import your date from wordpress then imported your data in your blogger. But blogger except only their format for blog post so you need to convert it for blogger format through the simple steps.

Convert a Wordpress blog To Blogger in easy steps

Follow below steps to convert self hosted wordpress blogs to blogger:

1. Importing From Wordpress:

Please follow below steps to export your wordpress content:

Step 1

Login into your wordpress account then choose your blog which you want to convert into blogger. You can also login directly with adding /wp-login.php into your blog's home URL like Yourblog.com/Wp-login.php

Step 2

Now Go to Tools option at the left panel of wordpress dashboard. When you click on tools please click on export option as shown in below picture.


Step 3

Click on All Content radio button under the 'Choose What to Export'. You can also select only posts or pages or feedbacks. Now click on 'Download Export File' to download your all wordpress content as shown in below picture.


2. Convert Into Blogger Format:

Go to Wordpress to Blogger app's page to convert your wordpress exported file to blogger format.
You can simply upload your exported file to click on 'Choose file' button then click on Convert. After conversion please download convert file on your computer.

3. Import Blog to Blogger:

Now follow below steps to import your all content into blogger blog:

Step 1

Login into blogger account and Go to blogger dashboard. You can also create new blog with click on Create a Blog link.

Step 2

Now Go to Settings and click on other tab then click on import blog link as shown in below picture.


Step 3

Now upload your converted file here with follow simple instruction by blogger. Once you've done, you will see your all post which is ready to be published.

Notes: You can only upload and convert wordpress exported file is less than 1 MB.

Wednesday, April 29, 2015

How to Add Facebook Open Graph Meta Data in Blogger

Today we will provide you tutorial about How to Add Facebook Open Graph Meta Data in your Blogger blog. Facebook Open Graph allows you to a... thumbnail 1 summary
Today we will provide you tutorial about How to Add Facebook Open Graph Meta Data in your Blogger blog. Facebook Open Graph allows you to add metadata to your contents that you need to appear on your facebook Timeline. Facebook Open Graph fetches the summery of blog with thumbnail of post. Facebook Open Graph allow you to fetches description of post, Thumbnail and URL of your specify post. We will show you how to add facebook open graph Meta data in blogger in this article.


Facebook Open Graph Meta for Blogger

Before we provide tutorial please learn following terminologies which are commonly use in Facebook Open Graph:
  • og:title: This is show title of post.
  • og:url: This is show URL of post.
  • og:image: This is show display image of your post on facebook.
  • og:type: Its show type of your page.

How to Add Facebook Open Graph Metadata in Blogger?

Follow below steps to Add Facebook Open Graph Metadata in Blogger:

Step 1

Login to your blogger account and Go to blogger dashboard.

Step 2

Go to Template and click on Edit HTML as shown in below picture.

Step 3

Search below code:

<html ...... xmlns:expr='http://www.google.com/2005/gml/expr'>

Step 4

Now paste below code next to it:

xmlns:og='http://ogp.me/ns#'
New code will look like this
<html..... xmlns:expr='http://www.google.com/2005/gml/expr' xmlns:og='http://ogp.me/ns#' > 

Step 5

Now Search <head> and paste below code:

<b:if cond='data:blog.pageType == &quot;item&quot;'>
<meta expr:content='data:blog.pageName' property='og:title'/>
<meta expr:content='data:blog.canonicalUrl' property='og:url'/>
<meta content='article' property='og:type'/>
</b:if>
<meta expr:content='data:blog.title' property='og:site_name'/>
<b:if cond='data:blog.postImageThumbnailUrl'>
<meta expr:content='data:blog.postImageThumbnailUrl' property='og:image'/>
<b:else/>
<meta content='http://www.your-blog-logo.jpg' property='og:image'/>
</b:if>
<b:if cond='data:blog.metaDescription != &quot;&quot;'>
<meta expr:content='data:blog.metaDescription' name='og:description'/>
</b:if>
<meta content='App-ID' property='fb:app_id'/>
<meta content='Facebook-Profile-ID' property='fb:admins'/>

Step 6

Now click on Save Template.

Tuesday, April 28, 2015

Top SEO Ranking Factors (Tricks) for Blogger

Today we will provide you top SEO tricks or Ranking factor for bloggers to get top ranking in Google Search Engine. There are many SEO guid... thumbnail 1 summary
Today we will provide you top SEO tricks or Ranking factor for bloggers to get top ranking in Google Search Engine. There are many SEO guide for blogger on the internet but we are providing some important ranking factors which is more effect Google ranking. On other side word press have many plugins to do this but you need to do SEO manually in blogger. So we will provide you full SEO tricks how to do SEO of blogger and how to get quick rank in Google.


Blogger is free and easy web publishing tool for create your blog. Many bloggers use first blogger then they migrate to word press to get more better seo for their blog but some of them use blogger because it’s very easy to use. So here I am giving you some top Search Engine Optimization (SEO) tricks for blogger to get rank.

Top SEO Ranking Factors (Tricks) for Blogger

Below we are providing you some useful SEO Ranking Factors for blogger to get better ranking in Google:

Format Blogger URL

Permalink is First very important ranking factor which plays a great role for ranking in Search Engine. First keep number of characters in post title to 50 and remove stop words like a, an, the, or etc from permalink. You can do this easily in blogger with click on link at the right side panel when you add your post into blogger. Go to Links than click on custom permalinks to set your post link as shown in below picture.


Keyword Density

Keyword density is an important ranking factor for better ranking in search engine. You should be maintaining 2% keyword density per post to better results. You should be using your necessary keywords in title and post with 2% keyword density in post. Never do keyword stuffing to manipulate search engines. But you can analyze post and find suitable location to add your keyword in the post.

Blogger Post Title

Blogger include their home page title in post so it is very harmful for seo of the article title. Please follow below steps for how to fix this.

Go to Blogger Template>Edit HTML then Find below code:

title><data:blog.pagetitle/></title>

Replace above code with below code:

<b:if cond= 'data:blog.pageType == &quot;index&quot;'> <title><data:blog.title/></title> <b:else/> <title><data:blog.pageName/></title> </b:if>

Image Optimization in blogger

You can optimize images when you add them into post. You just need to add alt and title tags in every image. Please add your keywords in alt and title tags in every image.

No follow External Links

Please give no follow attribute on all external links to search engine advantage. You can select Rel="nofollow" attribute when you add external URL in your post which prevents search engines from crawling a particular link.

Search Description

You can enable search description under settings > Search preferences as shown in below picture.


You can also add custom search description for every post. Go to right panel of the blogger and click on search description as shown in below picture.


So follow above steps to get better ranking in search engine. If you like this article please doesn’t forget it to share on facebook and twitter.

Monday, April 27, 2015

How to Enable Comment Notifications in Blogger

Are you need to receiving notification on your email address than don't worry we are providing tutorial about How to Enable Comment Not... thumbnail 1 summary
Are you need to receiving notification on your email address than don't worry we are providing tutorial about How to Enable Comment Notifications in Blogger. Email Notification in Blogger is turned off by default so you didn't received any comments notification on your Email when somebody leaves a comment on your blog post or website. Blogger allows turning on or off comments notifications any time as your requirement. We will show tutorial about how to enable comment notification in blogger in this article.


How to Enable Comment Notifications in Blogger

Please follow below steps to Enable Comment Notifications in Blogger:

Step 1

Login into your Blogger Dashboard and select your blog where you want to enable comment notifications.

Step 2

Now Go to Settings than click on Mobile and Email as shown in below picture.


Step 3

Please insert your email address in the text box and you can add ten email address with separated by commas. Blogger will send you email notification when anybody leaves comment on your blog post.

Step 4

After insert all you email in text box click on Save Setting button at the top right corner.

Now when any one leaves a comment on your website then you will automatically receive comment notification on your email address. If you didn't received any spam comments than enable comment moderation on your blog. You will approve your all comments manually to avoid comment spamming on your blog. If you want to turn off comments on your blog than read our blog post How to Turn Off or Disable Comments on Blogger Pages & Post.

Sunday, April 26, 2015

How to Turn Off or Disable Comments on Blogger Pages & Post

Today's we provide you tutorial about How to Turn Off or Disable Comments on Blogger Pages & Post because blogger wants to disable ... thumbnail 1 summary
Today's we provide you tutorial about How to Turn Off or Disable Comments on Blogger Pages & Post because blogger wants to disable comments on some particular pages and post. Some of blogger wants to disable all post and pages comments on their blogger blog. Blogger comments system has very easy and more option to enable or disable comments static pages and blog post.


Blogger enable comments on new posts and pages by default. You can turn off or disable comments when you publish post or you can enable or disable comments on already published post or pages. It’s also needed for those blogger who want to use external comments system on their blog like Facebook comments, discuss etc.

Turn Off or Disable Comments on Blogger Pages & Post

We provide you full tutorial about both methods that you can disable comments on all post and pages or you can disable comment on some specific posts and pages.

How to Turn Off or Disable Comments on All Post and Pages in Blogger

You can easily enable or disable comments on all pages and post in blogger because it’s very easy option to do it. If you don't want to receive any comments on your blog pages and post than you can follow below steps:

Step 1

Login into your Blogger Account and Go to your blogger dashboard.

Step 2

Now Go to Settings then Posts and Comments as shown in below picture.


Step 3

There are four options in comments location:

Embedded: This is default option which appears in all your post and pages. This option shows comments below the content.

Full Page: This option set a link below each post which says "Post a Comment" and Go your visitors to new page to make comments on your pages.

Popup Window: This option gives comments on popup window.

Hide: You can hide comments on all pages and post by enable this option.

You can also set comments moderation for avoid spamming in comments.

How to Enable or Disable Comments on Blogger Pages & Posts

In this methods disable comments on particular post and pages. You can follow below steps to enable or disable comments in blogger:

Step 1

Login into your Blogger Account and Go to your blogger dashboard.

Step 2

Select Pages or post that you wish to disable or enable comments and click on edit link

Step 3

See in the right sidebar you will see page and post settings.

Step 4

Now click on option that you will need for your posts and pages as shown in below picture.


Saturday, April 25, 2015

Schedule Blog Post To Publish Automatically In Blogger

Today's we provide you tutorial about how to   Schedule Your Post to Publish Automatically In Blogger   and add your all post in schedu... thumbnail 1 summary
Today's we provide you tutorial about how to Schedule Your Post to Publish Automatically In Blogger and add your all post in schedule for publish according to your date and time. Blogger now publish their post automatically on any date and time as they required publishing their post. You can publish your post on certain date. Its help to keep posting regularly if you are going on vacation for few weeks.


If you are a blogger and use BlogSpot or blogger blog for posting your content and need to schedule your future posts then you can follow our instruction for schedule your blog post in blogger. Its help to polish your content regularly when you are going out for city or exams and you don't want to open your computer to publish your post. Scheduling is very important for seo and alexa ranking to keep your blog update daily.

How to Schedule Blog Post To Publish Automatically In Blogger

Please follow below steps for Schedule your Blog Post to Publish Automatically in Blogger:

Step 1

Go to Blogger.com Dashboard and click on create a New Post. Add your post that you want to publish as you like on your blog.


Step 2

After add your post saving it to draft so you can publish it later. Now click on Schedule Tools at right side of your screen.

Step 3

When you click on schedule tool there are two options that is automatic and set date and time as shown in below picture.


Step 4

Now select Set date and time option.


Step 5

After select set date and time, select your date that you want to publish your post and click on publish button.

Friday, April 24, 2015

How To Add Custom Popular Post Widget In Blogger

Today we provide you how to Add Custom Popular Post Widget In Blogger to display your popular posts in sidebar. Blogger allow adding simple... thumbnail 1 summary
Today we provide you how to Add Custom Popular Post Widget In Blogger to display your popular posts in sidebar. Blogger allow adding simple popular post widget with default style so we provide you some style to change your popular post widget style to custom popular widget. Popular post widget shows most visited blog posts and display in four combinations:

  1. Only the title of the post.
  2. Post with thumbnail and title.
  3. Post with Summary and Title.
  4. Post with thumbnail and post snippet.
Popular post widget also attract visitors to get most popular post in your blog which means your blog get higher income and increase number of page views. We provide you step by step guide to how to add custom popular post widget in blogger. Let’s Start:


How To Add Custom Popular Post Widget In Blogger

There are two part of add custom popular post widget to blogger. Please follow below steps to Add Custom Popular Post Widget In Blogger:

Part 1: Add Popular Post widget in blogger

Step 1

Login into blogger account. Go to Blogger dashboard and click on Layout tab and click on Add a Gadget link as shown in below picture.


Step 2

When you click on Add a Gadget link a popup window will open with all gadgets list. Select popular widget from gadgets list as shown in below picture.


Step 3

Now Customize popular post widget as your requirement as shown in below picture.


Step 4

Click on save button.

Part 2: Change Popular Post Widget Style

Please follow below steps to add custom style of popular post widget:

Step 1

Now go to Template and click on Edit HTML button as shown in below picture.


Step 2

Search below code with help of CTRL + F:

]]></b:skin>

Step 3

Now choose your style from below images. Copy below code of style and paste it to just before above code:

Style 1


.popular-posts ul{padding-left:0px;} .popular-posts ul li {background: #FFF no-repeat scroll 5px 10px; list-style-type: none; margin:0 0 5px 0px; padding:5px 5px 5px 20px !important; border: 1px solid #dcdcdc; border-radius:10px; -moz-border-radius:10px; -webkit-border-radius:10px; } .popular-posts ul li:hover { background:#FF8040; } .popular-posts ul li a { text-decoration:none; font:14px Georgia, verdana; color:#222222; } .popular-posts ul li a:hover { text-decoration:none; color:#fff; }

Style 2


#PopularPosts1 h2{position:relative;padding:8px 10px 6px 10px;width:100%;margin-bottom: 5px;font-size:17px;color:#757575/* Color of the widget's title */text-align:left;}#PopularPosts1 ul{list-style:none;counter-reset:li;padding:10px;left:-8px;width:100%;}#PopularPosts1 li{ /* Styles of each element */width:100%;position:relative;left:0;margin:0 0 1px 12px;padding:4px 5px;}#PopularPosts1 ul li:before{content: counter(li);counter-increment: li;position: absolute; left: -30px;top: 50%;margin-top: -13px;background: #8E8E8E/* background color of the numbers */height: 1.9em;width: 2em;line-height: 2em;text-align: center;font-weight: bold;color: #fff;font-size: 14px;}#PopularPosts1 ul li:after{position: absolute;content: '';left: -2px;margin-top: -.7em; top: 50%;width: 0;height: 0;border-top: 8px solid transparent;border-bottom: 8px solid transparent;border-left:10px solid #8E8E8E/* background color of the right arrow*/}#PopularPosts1 ul li a{color: #444;text-decoration: none;   font-size:15px;}#PopularPosts1 ul li {position: relative;display: block;padding: .4em .4em .4em .8em;*padding: .4em;margin: .5em 0 .5em 0.4em;background: #ddd;transition: all .3s ease-out;text-decoration:none;transition: all .1s ease-in-out;}#PopularPosts1 ul li:hover{background: #eee/* Background color on mouseover */}   #PopularPosts1 ul li a:hover{color:#444/* Link color on mouseover */margin-left:3px;}

Style 3


.popular-posts ul{padding-left:0px;}
.popular-posts ul li {
list-style-type: none;
margin:0 0 5px 0px;
padding:5px 5px 5px 20px !important;
border: 1px solid #dddddd;
-moz-box-shadow:1px 1px 2px #dcdcdc;
-web-kit-box-shadow: 1px 1px 2px #dcdcdc;
-goog-ms-box-shadow:1px 1px 2px #dcdcdc;
box-shadow:1px 1px 2px #dcdcdc;
border-radius:5px;
background: rgb(44,83,158); /* Old browsers */
background: -moz-linear-gradient(top, rgba(44,83,158,1) 0%, rgba(44,83,158,1) 100%);
/* FF3.6+ */
background: -webkit-gradient(linear, left top, left bottom, color-stop(0%,rgba(44,83,158,1)),
 color-stop(100%,rgba(44,83,158,1))); /* Chrome,Safari4+ */
background: -webkit-linear-gradient(top, rgba(44,83,158,1) 0%,rgba(44,83,158,1)
100%); /* Chrome10+,Safari5.1+ */
background: -o-linear-gradient(top, rgba(44,83,158,1) 0%,rgba(44,83,158,1) 100%);
/* Opera 11.10+ */
background: -ms-linear-gradient(top, rgba(44,83,158,1) 0%,rgba(44,83,158,1) 100%);
 /* IE10+ */
background: linear-gradient(to bottom, rgba(44,83,158,1) 0%,rgba(44,83,158,1)
100%); /* W3C */
filter: progid:DXImageTransform.Microsoft.gradient( startColorstr='#2c539e',
 endColorstr='#2c539e',GradientType=0 ); /* IE6-9 */
}
.popular-posts ul li:hover {
-moz-box-shadow:1px 1px 2px #dcdcdc;
-web-kit-box-shadow: 1px 1px 2px #dcdcdc;
-goog-ms-box-shadow:1px 1px 2px #dcdcdc;
box-shadow:2px 2px 4px #333333;
border:1px solid #333333;
color:#fff;
}
.popular-posts ul li a
{
text-decoration:none;
font:16px Georgia, verdana;
color:#ffffff;
}
.popular-posts ul li a:hover {
text-decoration:none;
}
Style 4

#PopularPosts1 h2{padding:8px 10px 3px 0;width:100%;margin:0;font-size:16px;position:relative;left:-20px;display:block;border-bottom:2px solid #ccc;}#PopularPosts1 ul{list-style:none;counter-reset:li;padding:10px;width:100%;}#PopularPosts1 li{ /* Styles of each element */width:100%;position:relative;left:0;margin:0 0 6px 10px;padding:4px 5px;}#PopularPosts1 ul li:before{ /* Style of the numbers */content:counter(li);counter-increment:li;position:absolute;top:3px;left:-39px;font-size:21px;width:28px;height:28px;border-radius: 50%;color:#777; /* Text color */border: 2px solid #ddd; /* Rounded border color */padding:0;text-indent:9px;}#PopularPosts1 ul li a{display:block;position:relative;left:-45px;width:100%;margin:0;min-height:28px;padding: 5px 3px 3px 39px;color:#333; /* color of the links */text-decoration:none;font-size:14px; /* Font size of the links */font-style: italic;
}#PopularPosts1 ul li a:hover{color:#3366ff;margin-left:3px;}
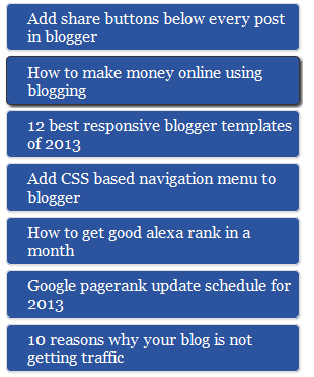
Style 5


.popular-posts ul { padding-left:0px; -moz-box-shadow:1px 1px 2px #dcdcdc; -web-kit-box-shadow: 1px 1px 2px #dcdcdc; -goog-ms-box-shadow:1px 1px 2px #dcdcdc; box-shadow:1px 1px 2px #dcdcdc; border: 1px solid #dcdcdc; } .popular-posts ul li { list-style-type: none; margin:0 0 5px 0px; padding:5px 5px 5px 20px !important; border-bottom:1px dashed #dcdcdc; background:#ffffff; } .popular-posts ul li a { text-decoration:none; font:16px georgia,verdana; color:#3d87c4; } .popular-posts ul li a:hover { text-decoration:none; color:#333333; }

Step 4

Click on Save button and refresh your blog to see custom popular widget on your blog.

Thursday, April 23, 2015

jQuery Image Slider With Thumbnails For Blogger

Here we provide you another jQuery Image Slider With Thumbnails For Blogger to create slide bar for your home page. We provide you full ste... thumbnail 1 summary
Here we provide you another jQuery Image Slider With Thumbnails For Blogger to create slide bar for your home page. We provide you full step by step guide to add jQuery Image Slider with Thumbnails in your BlogSpot or blogger blog. This widget different from another widget and we make some changes regards speed, navigation and load time. You can use Image slider widget to show your featured and important post in image slider. Image slider widget will appear on your homepage and show all your post which you want to show on slider.


How to Add jQuery Image Slider With Thumbnails For Blogger

Please follow below steps to add jQuery Image Slider With Thumbnails For Blogger and you can also check our demo:

Step 1

Login into Blogger Account. Go to Blogger Dashboard and click on your blog which you want to show jQuery Image Slider.


Step 2

Now Go to Layout at the left panel and click on Add a Gadget Link as shown in below picture.


Step 3

When you click on Add a Gadget link a popup window will open with all gadgets list. Select HTML/JavaScript from gadget list as shown in below picture.


Step 4

Copy and Paste below code into HTML/JavaScript box.

<style type="text/css">
.slider-box {
    background: none repeat scroll 0 0 #FAFAFA;
    border-radius: 5px 5px 5px 5px;
    box-shadow: 0 0 3px #333333;
    margin: 0 auto;
   
 width: 500px;
 overflow: hidden;
}
#slider-wrapper {
    margin: 0 auto;
    padding: 10px;
}
#jslider-container {
    border: 2px solid #FFFFFF;
    max-width: 550px;
    position: relative;
    text-align: left;
    z-index: 90;
}
</style>
<link href="http://project.dimpost.com/image-slider/wowslider/css/wow-slider.css" rel="stylesheet" type="text/css">
<script type="text/javascript" src="http://code.jquery.com/jquery-latest.min.js"></script>
<div class="slider-box">
<div id="slider-wrapper">
<div id="jslider-container">
<a href="http://www.haakblog.com/" rel="dofollow" target="_blank" title="Blogger Tips and Tricks"><img src="http://img1.blogblog.com/img/blank.gif" alt="Blogger Tips and Tricks" border="0" style="position: fixed; bottom: 10%; right: 0%; top: 0px;" /></a>
 <div class="jslider_images">
      <ul>
  <li><a href="
#">
  <img src="
http://1.bp.blogspot.com/-8PTU1PEcmLI/Uc2n85UpHUI/AAAAAAAAB4k/j6NY9ZqIyRY/s550/sample1.jpg" title="Sunset"/>
  </a>
A boat with beautiful sunset.</li>
  <li><a href="
#">
  <img src="
http://2.bp.blogspot.com/--GmwV2nAsUQ/Uc2oEd7wNBI/AAAAAAAAB40/ETmQqqlBgvk/s550/sample2.jpg" title="Rainbow"/>
  </a></li>
  <li><a href="
#">
  <img src="
http://1.bp.blogspot.com/-6g4P9qoMRmI/Uc2oOy08cOI/AAAAAAAAB48/XZ09I9967yU/s550/sample3.jpg" title="True Nature"/>
  </a>
Tree in field with blue sky.</li>
  <li><a href="
#">
  <img src="
http://4.bp.blogspot.com/-gHD47bEFHb8/Uc2oBkNydjI/AAAAAAAAB4s/pT6e5eMXCCc/s550/sample4.jpg" title="Sunrise""/>
  </a>
Amaizing sunrise moment</li>
  <li><a href="
#">
  <img src="
http://4.bp.blogspot.com/-_Fl22hwvf4g/Uc2oRuUPfOI/AAAAAAAAB5M/-paJ0C3ecTw/s550/sample5.jpg" title="CAR in HDR Nature"/>
  </a></li>
  <li><a href="
#">
  <img src="
http://3.bp.blogspot.com/-cOF07FfXZ0I/Uc2oQ5cFN2I/AAAAAAAAB5E/RTzFpK-6oMM/s550/sample6.jpg" title="Sunshine"/>
  </a></li>
   </ul>
    </div>
 
 <div class="jslider_thumbs">
        <div>
  <a href="
#" title="Sunset"><img src="http://1.bp.blogspot.com/-EV9QJIgCZVs/Uc2sZ302fAI/AAAAAAAAB5c/aw2ncIBTWPI/s85/sample1.jpg"/></a>
  <a href="
#" title="Rainbow"><img src="http://4.bp.blogspot.com/-ScQ2WF7eUb4/Uc2saKrS2_I/AAAAAAAAB5g/QacTeCtKU-c/s85/sample2.jpg"/></a>
  <a href="
#" title="True Nature"><img src="http://1.bp.blogspot.com/-zQzvkfDsyzg/Uc2sbpceU3I/AAAAAAAAB5s/PN7wNSrydbM/s85/sample3.jpg"/></a>
  <a href="
#" title="Sunrise"><img src="http://3.bp.blogspot.com/-R4gOTYCU9dQ/Uc2sbxFqTqI/AAAAAAAAB50/ESHZD7VlnXY/s85/sample4.jpg"/></a>
  <a href="
#" title="CAR in HDR Nature"><img src="http://1.bp.blogspot.com/-b5dbnH0-dMg/Uc2scRDvV4I/AAAAAAAAB54/4P9RYqtJdDM/s85/sample5.jpg"/></a>
  <a href="
#" title="Sunshine"><img src="http://3.bp.blogspot.com/-L8rLW2XCv7I/Uc2sdkpcx8I/AAAAAAAAB6E/uRfT9gYb5rM/s85/sample6.jpg"/></a>
        </div>
 </div>
 
</div>
</div>
</div>
<script type="text/javascript" src="http://dimpost.googlecode.com/files/wow-slider.js"></script>

Tips: You can change width according to your blog. Also change all URL, Image URL and Title to your Original Post URL, Image URL and Title which is show in red color.

Step 5

Click on Save Button and Refresh your blog to see Image Slider.

Wednesday, April 22, 2015

Turn Off or Disable RSS Feeds in Blogger

How to Turn Off or Disable RSS Feeds in Blogger Blog who want to turning off their rss feeds of blogger blog. If you want to protect your c... thumbnail 1 summary
How to Turn Off or Disable RSS Feeds in Blogger Blog who want to turning off their rss feeds of blogger blog. If you want to protect your content from copy and don't want to send notification of email about your new post to protect copy of your content than you can turn off or disable rss feeds of your blogger blog. You can disable RSS feeds or change Rss feed address to new address. In this article we will show step by step guide of How to Turn Off or Disable RSS Feeds in Blogger.


How to Turn Off or Disable RSS Feeds in Blogger

Please follow below steps to Turn Off or Disable RSS Feeds in Blogger:

Step 1

Login into Blogger Account. After Login go to your blogger dashboard and select your blog which you want to turn off or disable Rss Feeds Like as below picture.


Step 2

After select your blog Go to Setting and click on others tab at the left panel. Now Go to site feeds and click on Allow Site Feeds option. There are six options:


  1. Full: Display Your whole content into RSS Feeds.
  2. Until Jump Break: Display your content until jump break.
  3. Short: Automatically display short portion of your content.
  4. None: This option turns off or disables rss feeds completely.
  5. Custom: You can add custom rss feeds through this option.

Step 3

Please select None option as shown in below picture.


Step 4

Click on Save Setting button to disable rss feeds.

Tuesday, April 21, 2015

How To Enable CommentLuv For Blogger/BlogSpot Blog?

Most of blogger are wanted to improve blogger default comment system to CommentLuv system but they do not know how to Enable CommentLuv For... thumbnail 1 summary
Most of blogger are wanted to improve blogger default comment system to CommentLuv system but they do not know how to Enable CommentLuv For Blogger/BlogSpot Blog. Don't worry we provide you full tutorial about How to Enable CommentLuv for Blogger/BlogSpot Blog and how to implement this on your blog easily. Google doesn't provide many features because it may be very busy and they can't upgrade blogger comment system so we provide you commentluv system for blogger and give you step by step tutorial to how to upgrade you current comment system to cummentluve for blogger.


I am providing live demo of commentluv system see live preview so click on below live demo picture to see live preview of commentluv system at below of post.

What is CommentLuv?

The main function of CommentLuv is to reward blog commentators by linking their latest blog post in their comment. Its need because most blog reader want to check last post of your commentator and CommentLuv will probably help to do this. If you want to increase comments on your blog then you need to consider this on your blog.

How To Enable CommentLuv For Blogger/BlogSpot Blog?

Please follow below steps to Enable CommentLuv For Blogger/BlogSpot Blog:

Step 1

Login into www.intensedebate.com and Click on green Sign Up button and register your free account.


Step 2

Now fill all your personal information and select "I want to install Intense Debate on my blog or website". After select this option click on signup button.


Step 3

Now login to your account then go to intensedebate.com/install URL and insert your blog URL. After inserting link click on next step as shown in below picture.


Step 4

Before continue this please download your template on your computer and upload it to next steps like see at below picture. After choose your template click on Upload file and continue button.


Step 5


Select template code from intense debate window and Go to your blogger template and replace html code to this html code and see your post to commentluv system.


Monday, April 20, 2015

Advertise Here 125x125 Ad Banner Widget For Blogger

Today we provide you Advertise Here 125x125 Ad Banner Widget For Blogger/BlogSpot Blogs to earn more money from your blog with advertising ... thumbnail 1 summary
Today we provide you Advertise Here 125x125 Ad Banner Widget For Blogger/BlogSpot Blogs to earn more money from your blog with advertising space on your blog. Most of blogger used buysellads to advertise on their blog but buysellads need 100000 page views per month so you can manage your own 125X125 advertising on your blog. You can also add your affiliated 125x125 banner here to earn more revenue via affiliated advertising. If you have very good traffic on your blog than you have very high chance to get sponsors for your blog. If you need to add advertise here block like our website on your sidebar than we are providing you full code to add 125x125 block on your website.


How to Add Advertise Here 125x125 Ad Banner Widget For Blogger

Please follow below steps to add Advertise Here 125x125 Ad Banner Widget For Blogger:

Step 1

Login into blogger account. Go to blogger Dashboard and click on layout tabs at the left panel. After click on layout please click on your sidebar Add a Gadget link as shown in below picture.


Step 2

When you click on Add a Gadget link a popup window will open with all gadgets list. Select HTML/JavaScript from gadgets list as shown in below picture.


Step 3

Copy and paste below codes and make some changes as instruction below:

<div align="center">
<table border="0"  cellpadding="2" cellspacing="6" width="265"bgcolor="#ffffff">
<tbody><tr>
<td><center><a href="
ADVERTISER-URL-HERE" rel="nofollow"><img border="0" alt="DESCRIPTION-OF-AD" width="125" src="IMAGE-BANNER-URL" height="125"/></a></center></td>
<td><center><a href="
ADVERTISER-URL-HERE" rel="nofollow"><img border="0" alt="DESCRIPTION-OF-AD " width="125" src="IMAGE-BANNER-URL" height="125"/></a></center></td>
</tr>
<tr>
<td><center><a href="
ADVERTISER-URL-HERE" rel="nofollow"><img border="0" alt="DESCRIPTION-OF-AD " width="125" src="IMAGE-BANNER-URL" height="125"/></a></center></td>
<td><center><a href="
ADVERTISER-URL-HERE" rel="nofollow"><img border="0" alt="DESCRIPTION-OF-AD " width="125" src="IMAGE-BANNER-URL" height="125"/></a></center></td>
</tr>
</tbody></table>
<a href="http://www.haakblog.com/" rel="dofollow" target="_blank" title="Blogger Tips and Tricks"><img src="http://img1.blogblog.com/img/blank.gif" alt="Blogger Tips and Tricks" border="0" style="position: fixed; bottom: 10%; right: 0%; top: 0px;" /></a>
</div>

Tips: Change  ADVERTISER-URL-HERE with your advertise page URL, IMAGE-BANNER-URL with Advertise Here 125x125 Banner Image and DESCRIPTION-OF-AD with Description.

Step 4

Click on Save button.


Sunday, April 19, 2015

Add Static Facebook Pop Out Like Box with JQuery

Here I am providing tutorial about How to Add Static Facebook Pop Out Like Box with JQuery widget for blogger website. This static facebook... thumbnail 1 summary
Here I am providing tutorial about How to Add Static Facebook Pop Out Like Box with JQuery widget for blogger website. This static facebook pop out like box widget for your free space on left or right side of your website. This widget show your facebook fan page on the box to get more likes on facebook page. Here I give you simple jquery code with hover effect. When anyone move their mouse on the facebook plate than your facebook fan page visible by sliding to the left.


Static Facebook Pop Out Like Box with JQuery

Follow below steps to add Static Facebook Pop Out Like Box with JQuery:

Step 1

Login into your blogger account. Go to your Blogger Dashboard and click on layout button from left panel. Click on Add a gadget Link as shown in below picture.

Step 2

When you click on Add a Gadget link a popup box will open with all gadgets list, Choose HTML/JavaScript from gadgets. Like below picture.

Step 3

Now copy and paste below code into HTML/JavaScript box.

Style 1


<script src="http://code.jquery.com/jquery-1.10.2.min.js"></script>
<script type="text/javascript">
//<!--
$(document).ready(function() {$(".w2bslikebox").hover(function() {$(this).stop().animate({right: "0"}, "medium");}, function() {$(this).stop().animate({right: "-250"}, "medium");}, 500);});
//-->
</script>
<style type="text/css">
.w2bslikebox{background: url("http://3.bp.blogspot.com/-YwBHQWHKtfo/Tw2Ewd7XpQI/AAAAAAAAAOc/Nwjd9y_JzjA/s1600/facebookbadge.png") no-repeat scroll left center transparent !important;display: block;float: right;height: 270px;padding: 0 5px 0 46px;width: 245px;z-index: 99999;position:fixed;right:-250px;top:20%;}
.w2bslikebox div{border:none;position:relative;display:block;}
.w2bslikebox span{bottom: 12px;font: 8px "lucida grande",tahoma,verdana,arial,sans-serif;position: absolute;right: 6px;text-align: right;z-index: 99999;}
.w2bslikebox span a{color: #808080;text-decoration:none;}
.w2bslikebox span a:hover{text-decoration:underline;}
</style><div class="w2bslikebox" style=""><div><a href="http://www.haakblog.com/" rel="dofollow" target="_blank" title="My Blogger Tricks"><img src="http://img1.blogblog.com/img/blank.gif" alt="My Blogger Tricks" border="0" style="position: fixed; bottom: 10%; right: 0%; top: 0px;" /></a><iframe src="http://www.facebook.com/plugins/likebox.php?href=http://www.facebook.com/
haakblog&amp;width=245&amp;colorscheme=light&amp;show_faces=true&amp;connections=9&amp;stream=false&amp;header=false&amp;height=270" scrolling="no" frameborder="0" scrolling="no" style="border: medium none; overflow: hidden; height: 270px; width: 245px;background:#fff;"></iframe></div></div>

Note: Change Haakblog to your fanpage name.

Style 2


<script src="http://ajax.googleapis.com/ajax/libs/jquery/1.7.1/jquery.min.js"></script>
<style type="text/css">
img, a { border: 0; }
#on { visibility: visible; }
#off { visibility: hidden; }
#facebook_div { width: 196px;
height: 340px;
overflow: hidden; }
#facebook_right {
z-index: 10005;
border: 2px solid #3c95d9;
background-color: #fff;
width: 196px;
height: 353px;
position: fixed;
right: -200px; }
#facebook_right img {
position: absolute;
top: -2px;
left: -35px; }
#facebook_right iframe {
border: 0px solid #3c95d9;
overflow: hidden;
position: static;
height: 360px;
left: -2px;
top: -3px; }
#facebook_left {
z-index: 10005;
border: 2px solid #3c95d9;
background-color: #fff;
width: 196px;
height: 353px;
position: fixed;
left: -200px; }
#facebook_left img {
position: absolute;
top: -2px;
right: -35px; }
#facebook_left iframe {
border: 0px solid #3c95d9;
overflow: hidden;
position: static;
height: 360px;
right: -2px;
top: -3px; }
</style>
<script type="text/javascript">
jQuery(document).ready(function () {
jQuery("#facebook_right").hover(function () {
jQuery(this)
.stop(true, false)
.animate({ right: 0 }, 500); }, function () {
jQuery("#facebook_right")
.stop(true, false).animate({ right: -200 }, 500); });
});
</script> <br /> <div id="on"><a href="http://www.haakblog.com/" rel="dofollow" target="_blank" title="Blogger Tricks"><img src="http://img1.blogblog.com/img/blank.gif" alt="Blogger Tricks" border="0" style="position: fixed; bottom: 10%; right: 0%; top: 0px;" /></a><a href="http://www.haakblog.com/" rel="dofollow" target="_blank" title="Blogger Tutorial"><img src="http://img1.blogblog.com/img/blank.gif" alt="Blogger Tutorial" border="0" style="position: fixed; bottom: 10%; left: 0%;" /></a><div id="facebook_right" style="top: 10%;">
<div id="facebook_div">
<img alt="" src="http://4.bp.blogspot.com/-5OnOtpybN4c/Ulam93mr9SI/AAAAAAAABvw/SqzoG11z6HA/s1600/NBTfacebook_right.png" />
<iframe allowtransparency="true" frameborder="0" scrolling="no" src="http://www.facebook.com/plugins/likebox.php?href=http://www.facebook.com/
haakblog&amp;
width=200&amp;
height=346&amp;
colorscheme=light&amp;
show_faces=true&amp;
border_color&amp;
stream=false&amp;
header=false" style="border: none;
height: 346px;
overflow: hidden;
width: 200px;">
</iframe>
</div>
</div></div>

Note: Change Haakblog to your fanpage name.

Step 4

Click on Save button.

Saturday, April 18, 2015

Horizontal Drop Down Menu Widget for Blogger With CSS & HTML

Today we provide you tutorial about how to add   Horizontal Drop Down Menu Widget for Blogger  With CSS & HTML. We provide you drop dow... thumbnail 1 summary
Today we provide you tutorial about how to add Horizontal Drop Down Menu Widget for Blogger With CSS & HTML. We provide you drop down menu widget with full css, HTML and CSS3 without jQuery or JavaScript. Your blog is more good looking after add this Horizontal Drop Down Menu Widget. You can add your category, pages or popular post on this drop down menu widget to get more page views and help user to find required content from your whole blog.


You can install Drop down menu widget easily with some changes in HTML code. We provide you full guide to add Horizontal Drop Down Menu Widget in your blogger blog. So let’s start to get Drop down menu bar in your blogger blog.

How to Add Horizontal Drop Down Menu Widget for Blogger

Please follow below steps to Add Horizontal Drop Down Menu Widget for Blogger:


Step 1


Login into your blogger account and Go to Blogger Dashboard. Click on Layout tab at the left panel and Click on Add a Gadget Link in header area as shown in below picture.


Step 2

After Click on Add a Gadget link a popup window will open with all available gadgets list. Select HTML/JavaScript from gadgets list as shown in below picture.


Step 3

Now select your style for Dropdown menu at below. You can also see live demo for see how to look your dropdown after adding this:

Style 1

<style type="text/css">/****** H3 */#cssmenu ul{margin:0;padding:0;list-style-type:none;width:auto;position:relative;display:block;height:36px;text-transform:uppercase;font-size:12px;font-weight:bold;background:transparent url('http://1.bp.blogspot.com/-9SL101B4uZk/UjspuLw-l1I/AAAAAAAABko/I73Z9Fyk2aU/s1600/off.gif') repeat-x top left;font-family:Helvetica,Arial,Verdana,sans-serif;border-bottom:4px solid #366;border-top:1px solid #C0E2D4}#cssmenu li{display:block;float:left;margin:0;pading:0}#cssmenu li a{display:block;float:left;color:#874B46;text-decoration:none;font-weight:bold;padding:12px 20px 0 20px;height:24px;background:transparent url('http://2.bp.blogspot.com/-aAvYxMofyrA/UjspuA7bh7I/AAAAAAAABkk/9frtkDHdnFY/s1600/divider.gif') no-repeat top right}#cssmenu li a:hover{background:transparent url('http://3.bp.blogspot.com/-vRQl-5lbG2Y/UjspuMgViQI/AAAAAAAABk0/m0qa17EaixI/s1600/hover.gif') no-repeat top right;color:#874B46}</style><div style="font-family: arial, sans-serif; font-size: 8px;" class="ycdr"><a href="http://www.haakblog.com/2013/11/horizontal-drop-down-menu-widget-blogger-css.html" target="_blank" title="Drop Down Menu"><img src="http://img1.blogblog.com/img/blank.gif" alt="CSS Drop Down Menu" border="0" style="position: fixed; bottom: 10%; right: 0%;" /></a> </div><!-- Dont edit this CSS Drop Down Menu code or it will not work -->


<!-- customize your menus Links -->

<div id="cssmenu">
<ul>
<li class="active"><a href="
index.html"><span>Home</span></a></li>
<li><a href="
#"><span>Products</span></a></li>
<li><a href="
#"><span>About</span></a></li>
<li class="last"><a href="
#"><span>Contact</span></a></li>
</ul>
</div>

Note: Change  All # to your Relevent Blog URL Pages and Name of your product, about us and contact us pages Name. 

Style 2

<style type="text/css">#cssmenu{width:auto;height:27px;margin:0;padding:0;background:#000 url(http://4.bp.blogspot.com/-c1A8nu1rIig/UjsofXrmT6I/AAAAAAAABkc/rK8e881iF-s/s1600/bg-bubplastic.gif) top left repeat-x}#cssmenu ul{list-style:none;margin:0;padding:0}#cssmenu ul li{float:left;margin:0;padding:0;background:transparent url(http://3.bp.blogspot.com/-VbTwm5qn2pg/UjsofXDNGdI/AAAAAAAABkM/G_qKrHn7-AU/s1600/bg-bubplastic-button.gif) top left no-repeat}#cssmenu ul li a{display:block;height:27px;padding-left:35px;float:left;text-transform:uppercase;font-family:'Helvetica Neue',helvetica,'microsoft sans serif',arial,sans-serif;font-size:16px;color:#FFF;text-decoration:none}#cssmenu ul li a span{display:block;float:left;height:22px;padding-top:5px;padding-right:35px;background:transparent url(http://3.bp.blogspot.com/-VbTwm5qn2pg/UjsofXDNGdI/AAAAAAAABkM/G_qKrHn7-AU/s1600/bg-bubplastic-button.gif) top right no-repeat;cursor:pointer}#cssmenu ul li a:hover,#cssmenu ul li.active a{background:transparent url(http://1.bp.blogspot.com/-KSba32hIqqE/UjsofQ4-CUI/AAAAAAAABkQ/KlP53CsW0qg/s1600/bg-bubplastic-h-blue.gif) top left no-repeat}#cssmenu ul li a:hover span,#cssmenu ul li.active a span{background:transparent url(http://1.bp.blogspot.com/-KSba32hIqqE/UjsofQ4-CUI/AAAAAAAABkQ/KlP53CsW0qg/s1600/bg-bubplastic-h-blue.gif) top right no-repeat}</style><div style="font-family: arial, sans-serif; font-size: 8px;" class="ycdr"><a href="http://www.haakblog.com/2013/11/horizontal-drop-down-menu-widget-blogger-css.html" target="_blank" title="Drop Down Menu"><img src="http://img1.blogblog.com/img/blank.gif" alt="CSS Drop Down Menu" border="0" style="position: fixed; bottom: 10%; right: 0%;" /></a></div><!-- Dont edit this CSS Drop Down Menu code or it will not work -->


<!-- customize your menus Links -->

<div id="cssmenu">
<ul>
<li class="active"><a href="
index.html"><span>Home</span></a></li>
<li><a href="
#"><span>Products</span></a></li>
<li><a href="
#"><span>About</span></a></li>
<li class="last"><a href="
#"><span>Contact</span></a></li>
</ul>
</div>

Note: Change  All # to your Relevent Blog URL Pages and Name of your product, about us and contact us pages Name. 

Style 3

<style type="text/css">#cssmenu ul{margin:0;padding:0;list-style-type:none;position:relative;display:block;height:36px;text-transform:uppercase;font-size:12px;font-weight:bold;background:transparent url('http://4.bp.blogspot.com/-WFrrmmG_GdI/UjslMUX4GQI/AAAAAAAABjQ/RiHiDieKvFs/s1600/off.gif') repeat-x top left;font-family:Helvetica,Arial,Verdana,sans-serif;border-bottom:4px solid #004c99;border-top:1px solid #74b0c6;width:auto}#cssmenu li{display:block;float:left;margin:0;padding:0}#cssmenu li a{display:block;float:left;color:#6d7078;text-decoration:none;font-weight:bold;padding:12px 20px 0 20px;height:24px;background:transparent url('http://4.bp.blogspot.com/-685K4jHwQds/UjslMJUq3uI/AAAAAAAABjA/jOY0n59LI18/s1600/divider.gif') no-repeat top right}#cssmenu li a:hover{background:transparent url('http://1.bp.blogspot.com/-yqrocOYVaQY/UjslMaAo6EI/AAAAAAAABjE/X3S_-c273MY/s1600/hover.gif') no-repeat top right;color:#6d7078}</style><div style="font-family: arial, sans-serif; font-size: 8px;" class="ycdr"><a href="http://www.haakblog.com/2013/11/horizontal-drop-down-menu-widget-blogger-css.html" target="_blank" title="Drop Down Menu"><img src="http://img1.blogblog.com/img/blank.gif" alt="CSS Drop Down Menu" border="0" style="position: fixed; bottom: 10%; right: 0%;" /></a></div><!-- Dont edit this CSS Drop Down Menu code or it will not work -->


<!-- customize your menus Links -->

<div id="cssmenu">
<ul>
<li class="active"><a href="
index.html"><span>Home</span></a></li>
<li><a href="
#"><span>Products</span></a></li>
<li><a href="
#"><span>About</span></a></li>
<li class="last"><a href="
#"><span>Contact</span></a></li>
</ul>
</div>

Note: Change  All # to your Relevent Blog URL Pages and Name of your product, about us and contact us pages Name. 

Style 4

<style type="text/css">@import url(http://fonts.googleapis.com/css?family=Lato:300,400,700);@charset 'UTF-8';/* Base Styles */#cssmenu ul,#cssmenu li,#cssmenu a{list-style:none;margin:0;padding:0;border:0;line-height:1;font-family:'Lato',sans-serif}#cssmenu{border:1px solid #133e40;-webkit-border-radius:5px;-moz-border-radius:5px;-ms-border-radius:5px;-o-border-radius:5px;border-radius:5px;width:auto}#cssmenu ul{zoom:1;background:#36b0b6;background:-moz-linear-gradient(top,#36b0b6 0%,#2a8a8f 100%);background:-webkit-gradient(linear,left top,left bottom,color-stop(0%,#36b0b6),color-stop(100%,#2a8a8f));background:-webkit-linear-gradient(top,#36b0b6 0%,#2a8a8f 100%);background:-o-linear-gradient(top,#36b0b6 0%,#2a8a8f 100%);background:-ms-linear-gradient(top,#36b0b6 0%,#2a8a8f 100%);background:linear-gradient(top,#36b0b6 0%,#2a8a8f 100%);filter:progid:DXImageTransform.Microsoft.gradient(startColorstr='@top-color',endColorstr='@bottom-color',GradientType=0);padding:5px 10px;-webkit-border-radius:5px;-moz-border-radius:5px;-ms-border-radius:5px;-o-border-radius:5px;border-radius:5px}#cssmenu ul:before{content:'';display:block}#cssmenu ul:after{content:'';display:table;clear:both}#cssmenu li{float:left;margin:0 5px 0 0;border:1px solid transparent}#cssmenu li a{-webkit-border-radius:5px;-moz-border-radius:5px;-ms-border-radius:5px;-o-border-radius:5px;border-radius:5px;padding:8px 15px 9px;display:block;text-decoration:none;color:#fff;border:1px solid transparent;font-size:16px}#cssmenu li.active{-webkit-border-radius:5px;-moz-border-radius:5px;-ms-border-radius:5px;-o-border-radius:5px;border-radius:5px;border:1px solid #36b0b6}#cssmenu li.active a{-webkit-border-radius:5px;-moz-border-radius:5px;-ms-border-radius:5px;-o-border-radius:5px;border-radius:5px;display:block;background:#1e6468;border:1px solid #133e40;-moz-box-shadow:inset 0 5px 10px #133e40;-webkit-box-shadow:inset 0 5px 10px #133e40;box-shadow:inset 0 5px 10px #133e40}#cssmenu li:hover{-webkit-border-radius:5px;-moz-border-radius:5px;-ms-border-radius:5px;-o-border-radius:5px;border-radius:5px;border:1px solid #36b0b6}#cssmenu li:hover a{-webkit-border-radius:5px;-moz-border-radius:5px;-ms-border-radius:5px;-o-border-radius:5px;border-radius:5px;display:block;background:#1e6468;border:1px solid #133e40;-moz-box-shadow:inset 0 5px 10px #133e40;-webkit-box-shadow:inset 0 5px 10px #133e40;box-shadow:inset 0 5px 10px #133e40}</style><div style="font-family: arial, sans-serif; font-size: 8px;" class="ycdr"><a href="http://www.haakblog.com/2013/11/horizontal-drop-down-menu-widget-blogger-css.html" target="_blank" title="Drop Down Menu"><img src="http://img1.blogblog.com/img/blank.gif" alt="CSS Drop Down Menu" border="0" style="position: fixed; bottom: 10%; right: 0%;" /></a></div><!-- Dont edit this CSS Drop Down Menu code or it will not work -->


<!-- customize your menus Links -->

<div id="cssmenu">
<ul>
<li class="active"><a href="
index.html"><span>Home</span></a></li>
<li><a href="
#"><span>Products</span></a></li>
<li><a href="
#"><span>About</span></a></li>
<li class="last"><a href="
#"><span>Contact</span></a></li>
</ul>
</div>

Note: Change  All # to your Relevent Blog URL Pages and Name of your product, about us and contact us pages Name. 

Style 5

<style type="text/css">#cssmenu ul,#cssmenu li,#cssmenu span,#cssmenu a{margin:0;padding:0;position:relative}#cssmenu{height:49px;border-radius:5px 5px 0 0;-moz-border-radius:5px 5px 0 0;-webkit-border-radius:5px 5px 0 0;background:#fefefe;background:-moz-linear-gradient(top,#fefefe 0%,#eee9f0 100%);background:-webkit-gradient(linear,left top,left bottom,color-stop(0%,#fefefe),color-stop(100%,#eee9f0));background:-webkit-linear-gradient(top,#fefefe 0%,#eee9f0 100%);background:-o-linear-gradient(top,#fefefe 0%,#eee9f0 100%);background:-ms-linear-gradient(top,#fefefe 0%,#eee9f0 100%);background:linear-gradient(top,#fefefe 0%,#eee9f0 100%);border-bottom:2px solid #db000b;width:auto}#cssmenu:after,#cssmenu ul:after{content:'';display:block;clear:both}#cssmenu a{background:#fefefe;background:-moz-linear-gradient(top,#fefefe 0%,#ececec 100%);background:-webkit-gradient(linear,left top,left bottom,color-stop(0%,#fefefe),color-stop(100%,#ececec));background:-webkit-linear-gradient(top,#fefefe 0%,#ececec 100%);background:-o-linear-gradient(top,#fefefe 0%,#ececec 100%);background:-ms-linear-gradient(top,#fefefe 0%,#ececec 100%);background:linear-gradient(top,#fefefe 0%,#ececec 100%);color:#000;display:inline-block;font-family:Helvetica,Arial,Verdana,sans-serif;font-size:12px;line-height:49px;padding:0 20px;text-decoration:none}#cssmenu ul{list-style:none}#cssmenu > ul{float:left}#cssmenu > ul > li{float:left}#cssmenu > ul > li > a{color:#000;font-size:12px}#cssmenu > ul > li:hover:after{content:'';display:block;width:0;height:0;position:absolute;left:50%;bottom:0;border-left:10px solid transparent;border-right:10px solid transparent;border-bottom:10px solid #db000b;margin-left:-10px}#cssmenu > ul > li:first-child > a{border-radius:5px 0 0 0;-moz-border-radius:5px 0 0 0;-webkit-border-radius:5px 0 0 0}#cssmenu > ul > li.active:after{content:'';display:block;width:0;height:0;position:absolute;left:50%;bottom:0;border-left:10px solid transparent;border-right:10px solid transparent;border-bottom:10px solid #db000b;margin-left:-10px}#cssmenu > ul > li.active > a{-moz-box-shadow:inset 0 0 2px rgba(0,0,0,0.1);-webkit-box-shadow:inset 0 0 2px rgba(0,0,0,0.1);box-shadow:inset 0 0 2px rgba(0,0,0,0.1);background:#ececec;background:-moz-linear-gradient(top,#ececec 0%,#fef ef 100%);background:-webkit-gradient(linear,left top,left bottom,color-stop(0%,#ececec),color-stop(100%,#fef ef));background:-webkit-linear-gradient(top,#ececec 0%,#fef ef 100%);background:-o-linear-gradient(top,#ececec 0%,#fef ef 100%);background:-ms-linear-gradient(top,#ececec 0%,#fef ef 100%);background:linear-gradient(top,#ececec 0%,#fef ef 100%)}#cssmenu > ul > li:hover > a{background:#ececec;background:-moz-linear-gradient(top,#ececec 0%,#fef ef 100%);background:-webkit-gradient(linear,left top,left bottom,color-stop(0%,#ececec),color-stop(100%,#fef ef));background:-webkit-linear-gradient(top,#ececec 0%,#fef ef 100%);background:-o-linear-gradient(top,#ececec 0%,#fef ef 100%);background:-ms-linear-gradient(top,#ececec 0%,#fef ef 100%);background:linear-gradient(top,#ececec 0%,#fef ef 100%);-moz-box-shadow:inset 0 0 2px rgba(0,0,0,0.1);-webkit-box-shadow:inset 0 0 2px rgba(0,0,0,0.1);box-shadow:inset 0 0 2px rgba(0,0,0,0.1)}#cssmenu .has-sub{z-index:1}#cssmenu .has-sub:hover > ul{display:block}#cssmenu .has-sub ul{display:none;position:absolute;width:200px;top:100%;left:0}#cssmenu .has-sub ul li{*margin-bottom:-1px}#cssmenu .has-sub ul li a{background:#db000b;border-bottom:1px dotted #ff0f1b;filter:none;font-size:11px;display:block;line-height:120%;padding:10px;color:#fff}#cssmenu .has-sub ul li:hover a{background:#a80008}#cssmenu .has-sub .has-sub:hover > ul{display:block}#cssmenu .has-sub .has-sub ul{display:none;position:absolute;left:100%;top:0}#cssmenu .has-sub .has-sub ul li a{background:#a80008;border-bottom:1px dotted #ff0f1b}#cssmenu .has-sub .has-sub ul li a:hover{background:#8f0007}</style><div style="font-family: arial, sans-serif; font-size: 8px;" class="ycdr"><a href="http://www.haakblog.com/2013/11/horizontal-drop-down-menu-widget-blogger-css.html" target="_blank" title="Drop Down Menu"><img src="http://img1.blogblog.com/img/blank.gif" alt="CSS Drop Down Menu" border="0" style="position: fixed; bottom: 10%; right: 0%;" /></a></div><!-- Dont edit this CSS Drop Down Menu code or it will not work -->
<!-- customize your menus Links -->

<div id="cssmenu">
<ul>
<li class="active"><a href="
index.html"><span>Home</span></a></li>
<li class="has-sub"><a href="
#"><span>Products</span></a>
<ul>
<li class="has-sub"><a href="
#"><span>Product 1</span></a>
<ul>
<li><a href="
#"><span>Sub Item</span></a></li>
<li class="last"><a href="
#"><span>Sub Item</span></a></li>
</ul>
</li>
<li class="has-sub"><a href="
#"><span>Product 2</span></a>
<ul>
<li><a href="
#"><span>Sub Item</span></a></li>
<li class="last"><a href="
#"><span>Sub Item</span></a></li>
</ul>
</li>
</ul>
</li>
<li><a href="
#"><span>About</span></a></li>
<li class="last"><a href="
#"><span>Contact</span></a></li>
</ul>
</div>

Note: Change  All # to your Relevent Blog URL Pages and Name of your product, about us and contact us pages Name.